
I’ve got one. My Mum had one. My Gran had one. Pretty much everyone of a certain age has had one of these enamelled roasting tins. As meat eating habits have changed over the last 20 years or so, these roasters have become less ubiquitous but now, as my new passion for learning how to cook on our log burner develops, it is being pressed into service again in different roles.
Meet my old/new stove top oven!
Not my idea. I don’t have an original thought in my head. I had seen similar used as ovens on The Log Burner Cookery Group FB page but, of course, I had to come at things in a slightly different way.
I do feel that I am, in spirit, a Jazz Cook. Use what you have, make it up as you go along. This was a phrase attributed to an astonishing young cook in New York City who has a YouTube series that I have found endlessly inspiring. You can find one of her episodes here and that one will take you to others. #BudgetEats- go check her out.
However, sometimes I need to have a better base of knowledge to be able to judge why something went right or to be able to put it right if it went wrong. Many would say that baking is a bit of a Black Art and it can certainly seem that way but it really need not be too complicated. Temperature of the oven is pretty important though, especially at the start of the baking process.
I wanted to KNOW how hot the inside of my roasting tin was really getting before I put any food into it. So I got the stove up to a good temperature first and knew where it was using my trusty log burner temperature gauge…

When the little diamond shape is in in the white section in the middle I know I am cooking on gas..er..logs.
Then I dug the old oven temperature gauge out of the nightmare that is my kitchen drawer and popped it into the tin and put the lid on the top to see what temperature I could achieve.
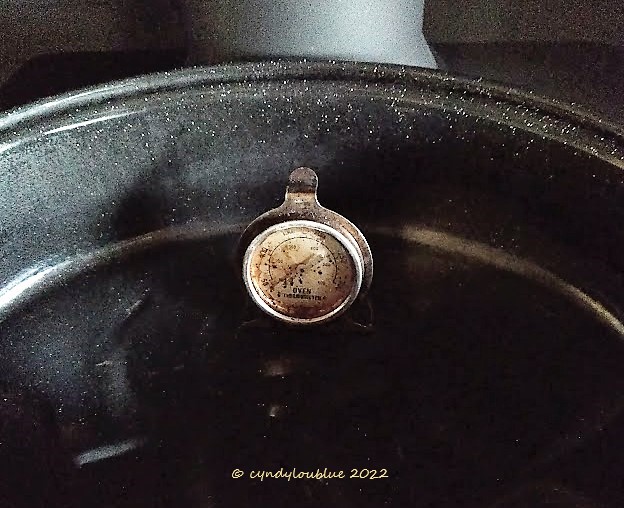
After only 20 minutes the temperature inside the pan was about 180°C. Perfect.
I wasn’t going to be putting the Brack Bread batter straight into the tin; I needed a cake tin that would fit into the “oven” in the normal way. My Brack Bread recipe makes a large size cake and so I just made a half portion. I found a silicone loaf pan languishing in another kitchen cupboard, gave it a freshen up, buttered it a bit and poured my batter in that. Into the oven it went and I set the timer for an hour. I thought that an hour would be a good starting point for checking as the cake would (hopefully!) be set enough by then not to fall. And anyway, I always had my husband’s old Granny to fall back on before then.
When he was a kid he asked his Irish Granny how she knew when things she was cooking in the oven were “done”. She said, “Oh, you don’t want to worry about that. It will tell you when it wants to come out.”
Sure enough, just before the hour was up a delicious cake smell wafted its way up the stairs to my office. I took the tin into the kitchen under a better light and opened it to this:
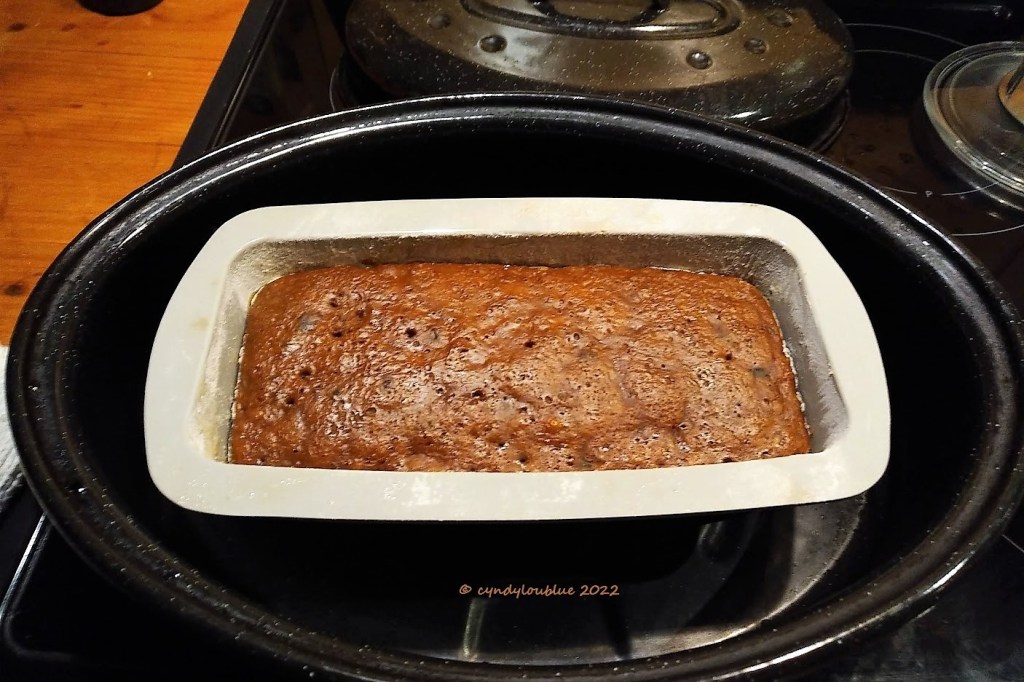
Yup. Brack Bread. Still a little soft on the top so I put it back in the oven for about 10 minutes and then turned it out.
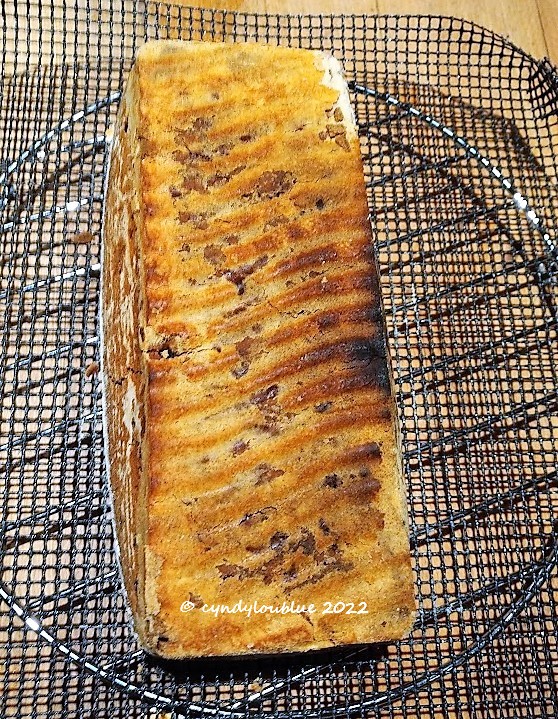
Not perfect. Who needs perfect? Not me! It was a little caught on the side that had sat nearest the flue pipe. Note for next time. It was more done on the bottom than on the top. Oh, well. When cooled, sliced and spread with a bit of butter, it was just divine! Enjoyed with a cup of tea while sitting and looking into the gently burning embers in our log burner on a bitterly cold December day, I could think of nothing nicer on this earth in that moment.
Recipe for Cyndy’s Brack Bread:
5 oz Mixed sultanas and raisins (or whatever you have in the cupboard in the way of dried fruit, chopped up) in a heatproof bowl.
Add half a large mug of strong, hot black tea. You can get fancy with this if you want to do so. Earl Grey? Rooibosh? Express yourself.
Mix together and leave over night or for at least 4 hours
When ready to bake:
1 egg, beaten
3 oz sugar
1 tsp mixed spice in a bowl
Add 7 oz self-raising flour
pinch of salt
1 tsp vanilla essence
Mix together well and add more tea or other liquid to mix if too stiff (now, where did I put that old bottle of Stone’s Ginger Wine….)
Bake in the oven at 175-180°C, test after an hour and 1/4.
If you’ve not done this before, poke it with a toothpick. If it comes out with batter still stuck to it, cook some more. And/or gingerly press your finger into the surface of the cake. Still a bit gooey? Pop it back for 10 minutes or so. Cool on wire rack. Store in a tin or wrapped in tinfoil. My instructions say it is better two days after cooking. I wouldn’t know.
Subscribe below to receive my posts as they are published. Buttons provided further down for liking, sharing and/or contacting me. Thanks!
